It's day 233 and it's my birthday, so I'm taking the day off of blogging. But I will leave everyone with this -- a recipe for Vegan Chocolate Cake from MarthaStewart.com!
And I hope that's not a glass of cow's milk sitting next to that plate!
Showing posts with label Recipes. Show all posts
Friday, August 16, 2013
Tuesday, August 13, 2013
Day 230 -- Thug Kitchen
One of the blogs listed in my recent post was Thug Kitchen. I stumbled across this blog early on in my vegan journey and I thought it was really funny. It's liberal use of curse words in order to persuade that reader to try recipes is strangely at odds with the "chill" vegan persona. And that's why it's so entertaining. Here's the photo of a recent entry for a Chickpea Pesto Sandwich that I plan to try very soon (with a slice of fresh tomato from my dad's garden).
All right, I'm definitely going to try this sandwich! And not because I feel threatened but because it looks really, really good!
Monday, August 12, 2013
Day 229 -- One Potato, Two Potato . . . Fifty Potato?
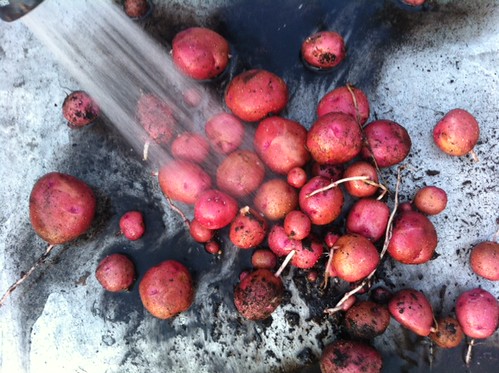
I'm reaping the benefits of my dad's huge garden this summer. And one of the veggies he's planted is potatoes. Actually, two types, red and yellow. Until I saw my dad dig potatoes for the first time last year, I never really knew how potatoes grew. I knew they grew underground, of course, but seeing them emerge from the dirt for the first time is so much fun!
When the shovel turns the dirt over, there they are, small and large, breaking free and lying at your feet. When you dig a plant, the potatoes come up in a variety of sizes, so I have a bucket of very small red potatoes, about the size of a ping-pong ball, and then larger potatoes, almost the size of my fist. Freshly dug potatoes are so tasty, too!
I found this recipe for Smoky Potato, Cabbage and Chickpea Skillet on a vegan blog called MapleSpice. Though it calls for vegan "parmesan cheese" which I'm not sure I can find anywhere in my area, I'm stil going to give this a try!
A little tip I'll pass along about freshly dug potatoes -- It's best not to wash off the dirt until right before you use them. They'll remain fresh longer!
When the shovel turns the dirt over, there they are, small and large, breaking free and lying at your feet. When you dig a plant, the potatoes come up in a variety of sizes, so I have a bucket of very small red potatoes, about the size of a ping-pong ball, and then larger potatoes, almost the size of my fist. Freshly dug potatoes are so tasty, too!
I found this recipe for Smoky Potato, Cabbage and Chickpea Skillet on a vegan blog called MapleSpice. Though it calls for vegan "parmesan cheese" which I'm not sure I can find anywhere in my area, I'm stil going to give this a try!
A little tip I'll pass along about freshly dug potatoes -- It's best not to wash off the dirt until right before you use them. They'll remain fresh longer!
Sunday, August 11, 2013
Day 228 -- Blogging About Blogs . . . Again!
See what I did there? I lured you in with promises of Rice Krispy Treats. As a kid, my siblings and I lived for Rice Krispy treats -- and Scotcheroos, which were made with peanut butter instead of marshmallows. But back to the treats later. VegNews website and newsletter does its awards survey this month and one of the categories is best vegan blog. I thought I'd list the candidates here since I might find some new sources of inspiration for my vegan cooking. Several of my favorite blogs are on the list. I've gone through the list and will feature a few new favorites over the next few days, but I'm pretty fussy about what I eat, so if the blog doesn't grab me right away, then I probably won't go back.
Here's the list!
Bittersweet
Chocolate-Covered Katie
Choosing Raw
FatFree Vegan Kitchen
Happy Herbivore
Healthy. Happy. Life.
Maple Spice
Mouthwatering Vegan Recipes
Oh She Glows
This Rawsome Vegan Life
Thug Kitchen
Vegan Yack Attack
Vegansaurus
I'm a big fan of FatFree Vegan Kitchen and Oh She Glows. And I'm going to add a new blog to my list. Happy.Healthy.Life. And as a reward for following along, here's the link for vegan Rice Krispy treats from the Healthy.Happy.Life. See, it does pay to explore new blogs!
Saturday, August 10, 2013
Day 227 -- A Whole Lotta Tomatoes
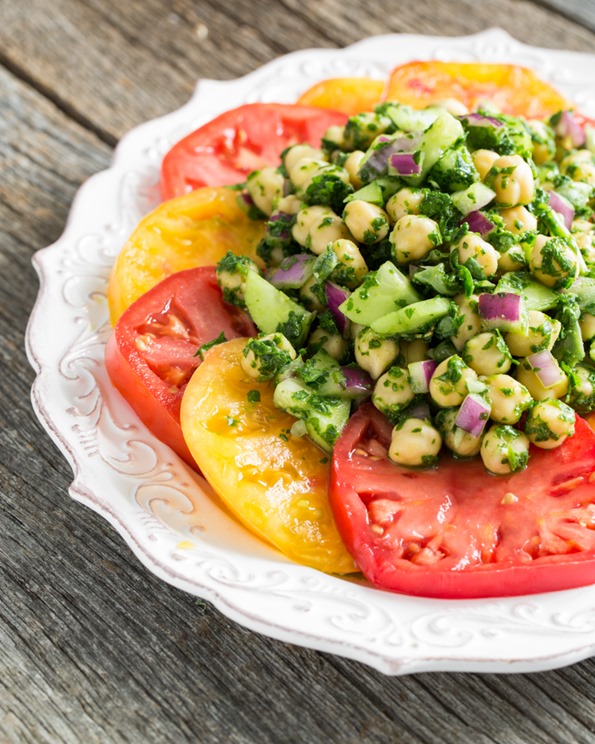
My father always plants a lot of tomatoes in his garden, so about this time of year, everyone around him gets inundated with fresh tomatoes. Since BLTs are out this year, as is a Caprese Salad (with fresh mozz), I've been looking for some good recipes. I love roasting fresh tomatoes and one of my favorite dishes is the Roasted Artichokes, Leeks and Tomatoes over Warm Farro that I posted a few weeks back.
This recipe for Eat Your Greens Chickpea Medley comes from Oh She Glows, one of my favorite vegan blogs. The recipe calls for both spinach and cilantro ground up and tossed with the chickpeas, but I might try basil instead of the cilantro as I have a lot of basil in my herb garden. The dressing for this uses lime juice, olive oil, garlic and cumin. Sounds yummy! I'll let you know how it was.
Sunday, August 4, 2013
Day 220 -- More Clinton Recipes -- Part Two
And here are the last three recipes from Clinton's vegan lunch. I'm going to try the quinoa right away. It sounds really yummy! All recipes are from this article on the AARP website.
Spiced and Herbed Quinoa With Green Onions
Serves 4
1 cup quinoa
2 cups vegetable stock or water
1/2 cup hothouse cucumber, diced
1/2 cup tomato, diced
2 tablespoons red onion, diced
2 green onions, thinly sliced
2 tablespoons chopped cilantro
1 teaspoon chopped jalapeƱo
3 tablespoons extra-virgin olive oil
1 tablespoon fresh lemon juice
1. In a small pot, combine the quinoa and stock (or water) and bring to a boil. Reduce the heat to a simmer and cover. Cook for 10 to 15 minutes or until the liquid has been absorbed. Let cool completely.
2. In a large bowl, combine the quinoa with the remaining ingredients. Toss to mix thoroughly. Serve chilled.
Snow Pea Salad
Serves 4
5 ounces snow peas, strings and tips removed, cut diagonally
2 ounces bean sprouts
1/4 medium red bell pepper, julienned
1 tablespoon soy sauce
2 teaspoons sesame oil
1 tablespoon sesame seeds, toasted
Salt, to taste
1. Blanch snow peas in boiling water for 8 to 10 seconds, then shock quickly in ice water. Pat dry.
2. In a medium bowl, combine the snow peas, bean sprouts and red pepper. Toss with the soy sauce, sesame oil and sesame seeds. Season to taste with salt. Serve chilled.
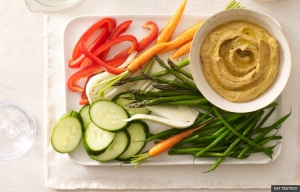
Garlicky Hummus With Raw Vegetable Batons
Serves 4
1 bulb garlic, roasted
Extra-virgin olive oil
8 ounces chickpeas, cooked
2 tablespoons tahini paste
2 tablespoons chopped cilantro
2 tablespoons chopped parsley
1 teaspoon ground cumin
1 teaspoon paprika
1/4 teaspoon cayenne pepper
2 tablespoons fresh lemon juice
Salt, to taste
Raw vegetables for dipping (carrots, red bell pepper, haricots verts, hothouse cucumber, fennel, pencil asparagus)
1. Cut 1/2 inch off the top of the garlic bulb. Place on a 9-inch square of foil. Drizzle with olive oil. Close the foil around the garlic and roast at 350° F about 40 to 50 minutes, until soft. Squeeze the garlic out of 3 cloves. Save the remainder of the bulb for other uses.
2. Combine the cooked chickpeas, roasted garlic and remaining hummus ingredients in a food processor and blend until smooth. Adjust the consistency of the hummus with a little water. Season to taste with salt.
3. Cut the dipping vegetables into batons (1/4-inch french fry shape). Lightly blanch the haricots verts and pencil asparagus and shock in ice water. Serve chilled.
Saturday, August 3, 2013
Day 219 -- More Clinton Recipes -- Part One
Continuing on from yesterday's post, here are a few more recipes, vegan dishes that are Bill Clinton's favorites.
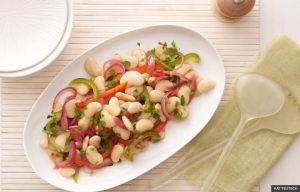
Gigante Bean Salad
Serves 4
1/2 cup dried gigante beans (or cannellini beans)
1 bay leaf
1/2 teaspoon salt
1/4 cup extra-virgin olive oil
1/3 cup thinly sliced onion
1/4 cup thinly sliced green bell pepper
1/4 cup thinly sliced red bell pepper
Black pepper, to taste
1 teaspoon minced garlic
2 tablespoons white wine vinegar
2 tablespoons chopped parsley
1. Place the beans in a bowl and cover with water. Let them stand overnight. Drain.
2. Place the beans in a medium pot and cover with 6 inches of water. Add the bay leaf and bring to a boil, skimming any foam that rises to the surface. Reduce the heat to low and simmer 1 1/2 hours or until the beans are tender. Season with the salt and cook an additional 5 minutes. Drain the beans and discard the bay leaf.
3. Meanwhile, heat the olive oil in a large skillet over medium heat. Add the onion and the bell peppers, lightly season with salt and black pepper, and stir frequently until the bell pepper mixture is tender, about 5 to 6 minutes. Add the garlic and vinegar and cook for 1 minute.
4. Add the beans and parsley to the bell pepper mixture. Adjust seasoning if necessary. Serve chilled.
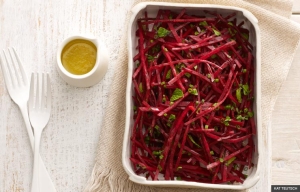
Shredded Red Beets in Vinaigrette
Serves 4
8 ounces red or yellow beets, shredded
3 tablespoons freshly squeezed orange juice
1 tablespoon freshly squeezed lemon juice
1 tablespoon extra-virgin olive oil
2 tablespoons minced chives, mint and parsley
Kosher salt, to taste
1. Peel the beets with a vegetable peeler and grate with a mandoline or in a food processor fitted with a shredding blade.
2. Combine the orange juice, lemon juice and olive oil. Toss with the beets and herbs. Season to taste with the salt.
3. Marinate at least 1 hour. Serve chilled.
Gigante Bean Salad
Serves 4
1/2 cup dried gigante beans (or cannellini beans)
1 bay leaf
1/2 teaspoon salt
1/4 cup extra-virgin olive oil
1/3 cup thinly sliced onion
1/4 cup thinly sliced green bell pepper
1/4 cup thinly sliced red bell pepper
Black pepper, to taste
1 teaspoon minced garlic
2 tablespoons white wine vinegar
2 tablespoons chopped parsley
1. Place the beans in a bowl and cover with water. Let them stand overnight. Drain.
2. Place the beans in a medium pot and cover with 6 inches of water. Add the bay leaf and bring to a boil, skimming any foam that rises to the surface. Reduce the heat to low and simmer 1 1/2 hours or until the beans are tender. Season with the salt and cook an additional 5 minutes. Drain the beans and discard the bay leaf.
3. Meanwhile, heat the olive oil in a large skillet over medium heat. Add the onion and the bell peppers, lightly season with salt and black pepper, and stir frequently until the bell pepper mixture is tender, about 5 to 6 minutes. Add the garlic and vinegar and cook for 1 minute.
4. Add the beans and parsley to the bell pepper mixture. Adjust seasoning if necessary. Serve chilled.
Shredded Red Beets in Vinaigrette
Serves 4
8 ounces red or yellow beets, shredded
3 tablespoons freshly squeezed orange juice
1 tablespoon freshly squeezed lemon juice
1 tablespoon extra-virgin olive oil
2 tablespoons minced chives, mint and parsley
Kosher salt, to taste
1. Peel the beets with a vegetable peeler and grate with a mandoline or in a food processor fitted with a shredding blade.
2. Combine the orange juice, lemon juice and olive oil. Toss with the beets and herbs. Season to taste with the salt.
3. Marinate at least 1 hour. Serve chilled.
Friday, August 2, 2013
Day 218 -- Bill Clinton, Vegan-In-Chief
I came across this article on the AARP website (no, I don't visit there, it was linked from another blog) about Bill Clinton and his recent switch to veganism -- Bill Clinton Explains Why He Became A Vegan. To be honest, Clinton was one of the inspirations I had for trying a vegan diet. He had experienced the kind of heart problems that have plagued my own parents and he chose veganism because it represented the best and fastest way to get healthy.
The reporter describes a lunch they had along with his conversation about Clinton's vegan diet. Many of Clinton's thoughts about the diet are the same as mine are. He misses yogurt and cheese, eats as much as he wants as long as it's low fat, and is feeling more healthy than he has in years. All things that I've expressed.
I was bemused by one of the comments -- that because Clinton eats a piece of salmon or Omega-3 eggs once a week, that he isn't a "real" vegan. I know that ethical vegans seem to hold themselves to a higher standard, but my feeling is that if 99% of your calories come from plants, you should be able to call yourself a vegan. There is no other term to describe the diet you maintain for the majority of the time. I wouldn't tell someone I was a vegetarian, because they might choose to make me a grilled cheese sandwich for lunch. I say I'm a vegan because, for the great majority of the time, I choose not to eat meat, eggs or cheese. I'm a vegan who occasionally cheats on their diet. Besides, who made you the word police?
On another note, the recipes were posted for the vegan lunch, so I've decided to repost them here because, hey, if they're good enough for Bill Clinton, they're good enough for me!
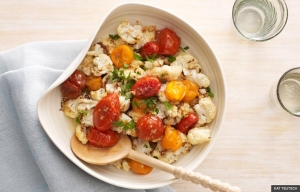
Roasted Cauliflower and Cherry Tomatoes
Serves 4
1 head cauliflower
5 teaspoons extra-virgin olive oil
1 teaspoon chopped garlic
Salt, to taste
White pepper, to taste
1/2 pint cherry tomatoes
1 teaspoon Dijon mustard
1 teaspoon red wine vinegar
1 tablespoon chopped parsley
1. Clean the cauliflower and cut into small florets.
2. Toss the cauliflower with 2 teaspoons olive oil, garlic, salt and pepper, and roast at 375° F for 15 to 20 minutes.
3. Toss the tomatoes in 1 teaspoon olive oil and add to the cauliflower. Roast an additional 8 minutes.
4. Whisk together the Dijon mustard and the vinegar, then slowly incorporate the remaining 2 teaspoons olive oil to make the vinaigrette.
5. In a bowl, gently toss together the cauliflower-tomatoes mixture, the parsley and the vinaigrette. Serve.
The reporter describes a lunch they had along with his conversation about Clinton's vegan diet. Many of Clinton's thoughts about the diet are the same as mine are. He misses yogurt and cheese, eats as much as he wants as long as it's low fat, and is feeling more healthy than he has in years. All things that I've expressed.
I was bemused by one of the comments -- that because Clinton eats a piece of salmon or Omega-3 eggs once a week, that he isn't a "real" vegan. I know that ethical vegans seem to hold themselves to a higher standard, but my feeling is that if 99% of your calories come from plants, you should be able to call yourself a vegan. There is no other term to describe the diet you maintain for the majority of the time. I wouldn't tell someone I was a vegetarian, because they might choose to make me a grilled cheese sandwich for lunch. I say I'm a vegan because, for the great majority of the time, I choose not to eat meat, eggs or cheese. I'm a vegan who occasionally cheats on their diet. Besides, who made you the word police?
On another note, the recipes were posted for the vegan lunch, so I've decided to repost them here because, hey, if they're good enough for Bill Clinton, they're good enough for me!
Roasted Cauliflower and Cherry Tomatoes
Serves 4
1 head cauliflower
5 teaspoons extra-virgin olive oil
1 teaspoon chopped garlic
Salt, to taste
White pepper, to taste
1/2 pint cherry tomatoes
1 teaspoon Dijon mustard
1 teaspoon red wine vinegar
1 tablespoon chopped parsley
1. Clean the cauliflower and cut into small florets.
2. Toss the cauliflower with 2 teaspoons olive oil, garlic, salt and pepper, and roast at 375° F for 15 to 20 minutes.
3. Toss the tomatoes in 1 teaspoon olive oil and add to the cauliflower. Roast an additional 8 minutes.
4. Whisk together the Dijon mustard and the vinegar, then slowly incorporate the remaining 2 teaspoons olive oil to make the vinaigrette.
5. In a bowl, gently toss together the cauliflower-tomatoes mixture, the parsley and the vinaigrette. Serve.
Wednesday, July 31, 2013
Day 216 -- Fruit Crisps And Crumbles
Peaches are in season now and some of the most fragrant and juicy varieties are available at the grocery store. In my former days as an unhealthy un-vegan eater, I used to make a killer fruit "kuchen". It had a buttery crust topped with fresh fruit and custard made of eggs, sugar and sour cream, and topped with streusel. Yum!
Of course, that's off the list now, but I have made a couple of fruit crisps using pie cherries picked from my cherry tree. I just found this recipe for a healthy fruit crisp on the Smart Balance facebook page and I'm going to add it to my recipe book. I've tweaked it a bit, but I think it's worth a try.
Fruit Crisp
Filling:
3 cups sweet peaches, sliced and peeled, or any fresh fruit
6 tbsp honey
1/2 lemon, zested and juiced
3 tsp cornstarch
Topping:
3/4 cup quick oats
1/4 cup chopped walnuts
1/3 cup whole wheat flour
1/2 cup light brown sugar
3/4 tsp cinnamon
1/3 cup vegan (healthy) margerine
Heat oven to 375°F. Combine fruit, honey, lemon juice and zest in large bowl. Sprinkle with cornstarch. Toss until fruit is coated. Place fruit in an ungreased pie dish. Mix remaining ingredients. Sprinkle over the fruit. Bake about 40 minutes or until topping is golden brown and fruit is tender.
Of course, that's off the list now, but I have made a couple of fruit crisps using pie cherries picked from my cherry tree. I just found this recipe for a healthy fruit crisp on the Smart Balance facebook page and I'm going to add it to my recipe book. I've tweaked it a bit, but I think it's worth a try.
Fruit Crisp
Filling:
3 cups sweet peaches, sliced and peeled, or any fresh fruit
6 tbsp honey
1/2 lemon, zested and juiced
3 tsp cornstarch
Topping:
3/4 cup quick oats
1/4 cup chopped walnuts
1/3 cup whole wheat flour
1/2 cup light brown sugar
3/4 tsp cinnamon
1/3 cup vegan (healthy) margerine
Heat oven to 375°F. Combine fruit, honey, lemon juice and zest in large bowl. Sprinkle with cornstarch. Toss until fruit is coated. Place fruit in an ungreased pie dish. Mix remaining ingredients. Sprinkle over the fruit. Bake about 40 minutes or until topping is golden brown and fruit is tender.
Monday, July 29, 2013
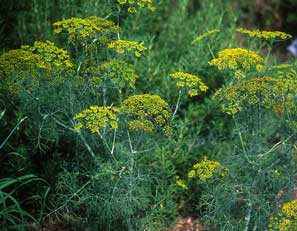
Day 214 -- My Little Herb Garden -- Dill
The final herb in my little herb garden is dill. I haven't used a lot of fresh dill and the reason I grew it was so I could use it to make refrigerator dill pickles. I love the scent of dill and and the taste, so I searched for a recipe and found a recipe with roasted veggies!
I love roasted veggies. I make them into sandwiches and I eat them over whole grains. And I also love to have them over greens as a salad. One of my favorite recipes is the Roasted Artichoke, Leek and Tomato Over Farro, a dish that I've made three or four times since I first tasted it a few weeks ago.
Now I have a new recipe to add to my book -- Roasted Vegetable Salad with Dill Dressing which I found on Straight Up Food.
This salad has a wonderful dressing made of fresh dill, avocado, tofu, and scallions. The roasted veggies are golden beets, cherry tomatoes, bell peppers, red onion and zucchini. Yum! This also might be nice with a few roasted red potatoes. I dug some fresh red potatoes from my father's garden so I'm going to add them to this dish and let you know how it goes!
I love roasted veggies. I make them into sandwiches and I eat them over whole grains. And I also love to have them over greens as a salad. One of my favorite recipes is the Roasted Artichoke, Leek and Tomato Over Farro, a dish that I've made three or four times since I first tasted it a few weeks ago.
Now I have a new recipe to add to my book -- Roasted Vegetable Salad with Dill Dressing which I found on Straight Up Food.
This salad has a wonderful dressing made of fresh dill, avocado, tofu, and scallions. The roasted veggies are golden beets, cherry tomatoes, bell peppers, red onion and zucchini. Yum! This also might be nice with a few roasted red potatoes. I dug some fresh red potatoes from my father's garden so I'm going to add them to this dish and let you know how it goes!
Sunday, July 28, 2013
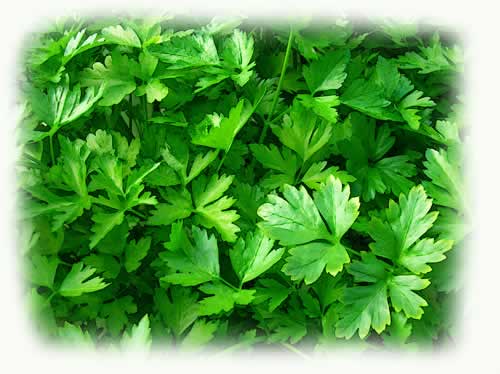
Day 213 -- My Little Herb Garden -- Italian Parsley
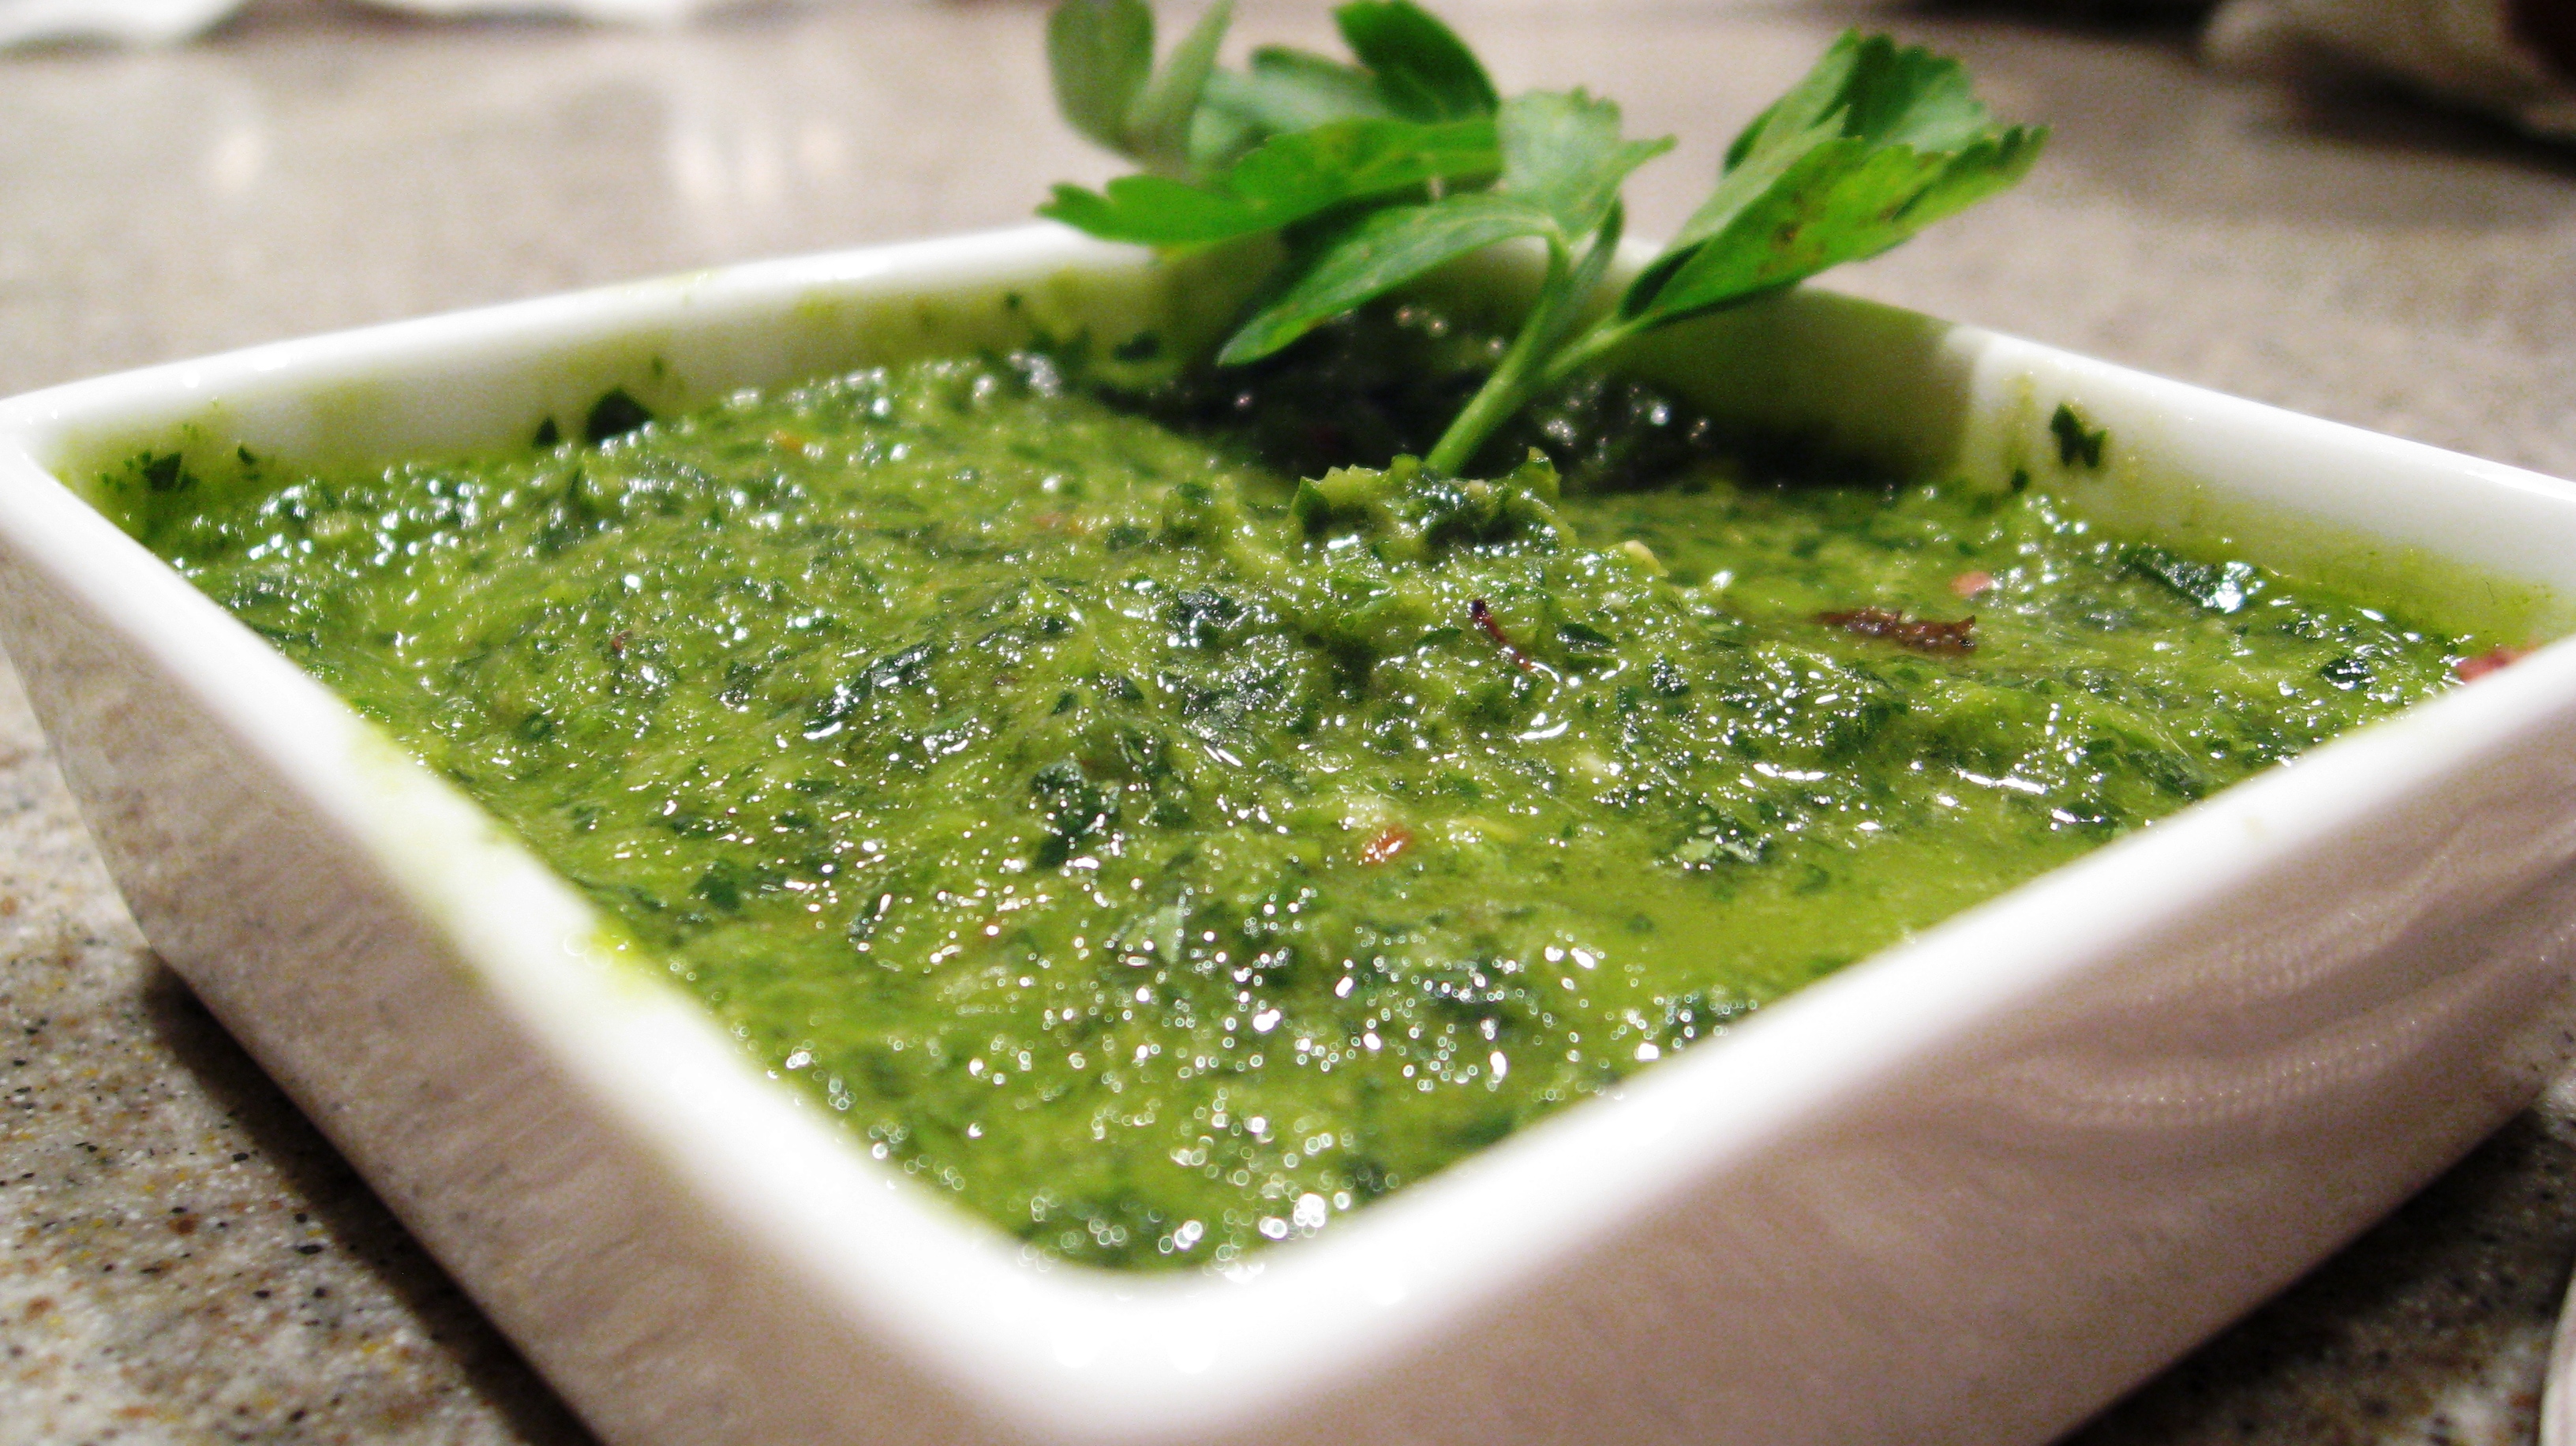
I've come to appreciate the taste of Italian parsley and since I've planted it in my herb garden, I've used it to top a lot of dishes. But I found this recipe for Chimichurri which is an Argentinian pesto-like sauce made with both cilantro and Italian parsley.
Although it usually is used as a sauce for meat, it also tastes good with pasta or bread. It does have a fair bit of olive oil in it, but this recipe makes 2/3 cup and that can go a long way over pasta or as a spread for bruschetta. The recipe is from the Herbivoracious blog which is a wonderful vegetarian and vegan resource!
Chimichurri
Makes 2/3 cup
1/3 cup extra-virgin olive oil
1 garlic clove, peeled and chopped fine or pressed
1 cup well-rinsed parsley leaves, lightly packed
1 cup well-rinsed cilantro leaves, lightly packed
1 teaspoon salt
1/4 teaspoon freshly ground black pepper
1 tablespoon sherry vinegar
1/4 cup red onion, minced (or add to food processor before herbs)
1 tablespoon capers, rinsed
In a small food processor, combine the olive oil and garlic and run until the garlic is well distributed. If you don’t feel like mincing the onion by hand, you can add it in chunks now, but it won’t look as nice. If you don’t have a small food processor, you might need to make a double batch as a full size machine probably won’t work well on this small quantity.
Add the parsley, cilantro, salt, pepper and vinegar and process until minced but with still a bit of texture left in the leaves.
Remove from the food processor and mix in the onions and capers.
Let rest at least 30 minutes, then taste and adjust salt, pepper and vinegar as needed.
Although it usually is used as a sauce for meat, it also tastes good with pasta or bread. It does have a fair bit of olive oil in it, but this recipe makes 2/3 cup and that can go a long way over pasta or as a spread for bruschetta. The recipe is from the Herbivoracious blog which is a wonderful vegetarian and vegan resource!
Chimichurri
Makes 2/3 cup
1/3 cup extra-virgin olive oil
1 garlic clove, peeled and chopped fine or pressed
1 cup well-rinsed parsley leaves, lightly packed
1 cup well-rinsed cilantro leaves, lightly packed
1 teaspoon salt
1/4 teaspoon freshly ground black pepper
1 tablespoon sherry vinegar
1/4 cup red onion, minced (or add to food processor before herbs)
1 tablespoon capers, rinsed
In a small food processor, combine the olive oil and garlic and run until the garlic is well distributed. If you don’t feel like mincing the onion by hand, you can add it in chunks now, but it won’t look as nice. If you don’t have a small food processor, you might need to make a double batch as a full size machine probably won’t work well on this small quantity.
Add the parsley, cilantro, salt, pepper and vinegar and process until minced but with still a bit of texture left in the leaves.
Remove from the food processor and mix in the onions and capers.
Let rest at least 30 minutes, then taste and adjust salt, pepper and vinegar as needed.
Saturday, July 27, 2013
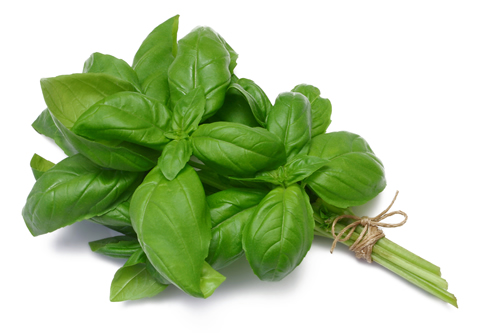
Day 212 -- My Little Herb Garden -- Basil
The third herb I have growing in my little herb garden is basil. I love basil and one of my favorite ways to eat basil is on a Caprese Salad. But there is no vegan substitute for fresh mozzarella cheese. And you can't do a caprese without the cheese. So the next best use for basil is pesto!
But pesto also requires parmesan cheese. However, I just came across a recipe for pesto that uses nuts instead of cheese. This recipe for Pesto Pasta comes from one of my favorite blogs, Straight Up Food.
It uses water, walnuts, garlic and basil. I've decided to try it with roasted garlic rather than raw garlic. Hopefully, that will give it a mellower taste.
But pesto also requires parmesan cheese. However, I just came across a recipe for pesto that uses nuts instead of cheese. This recipe for Pesto Pasta comes from one of my favorite blogs, Straight Up Food.
It uses water, walnuts, garlic and basil. I've decided to try it with roasted garlic rather than raw garlic. Hopefully, that will give it a mellower taste.
Friday, July 26, 2013
Day 211 -- My Little Herb Garden -- Cilantro
I've been obsessed with cilantro lately. And it just doesn't seem to grow fast enough in my little herb garden. As fast as it grows, I pick it. I've been putting it on top of my Roasted Sweet Potato and Black Bean Chili. Yes, I eat chili in the summer time. And I've been putting in stir fries and adding it to sandwiches and salads. But one thing I haven't done is made a really killer guacamole with it. And since I've been buying avocados on a regular basis, I decided to look for a good guacamole recipe.
I found this recipe on the Simply Recipes website and it's called the Perfect Guacamole from Elise Bauer. I've modified it a bit to make it My Favorite Guacamole! By the way, the word guacamole comes from two Aztec Nahuatl words – ahuacatl (avocado) and molli (sauce).
The Best Guacamole
2 ripe avocados
1/2 cup red onion, chopped finely
1 jalapeno, stem and seeds removed, minced finely
1/4 cup fresh cilantro (leaves and tender stems), finely chopped
1 tablespoon of fresh lime juice
1/2 teaspoon sea salt
Freshly grated black pepper
1/2 ripe tomato, seeds and pulp removed, chopped
Cut avocados in half and remove the seed, then slice into narrow wedges. Peel the skin from the flesh and put in a bowl. Mash the avocado, leaving come larger chunks.
Add the chopped onion, cilantro, lime juice, salt and pepper and mash some more. Add a bit of the jalapeno to the guacamole and taste. Keep adding until it reaches the desired heat. I don't add much, but some people like it hot. If you're making ahead, cover the guacamole with plastic wrap, pressing the wrap against the dip and refrigerate. However, I don't like it as much once it's been refrigerated, so I think it's best to make it right before serving. Whichever way you do it, mix in the chopped tomatoes just before serving.
I found this recipe on the Simply Recipes website and it's called the Perfect Guacamole from Elise Bauer. I've modified it a bit to make it My Favorite Guacamole! By the way, the word guacamole comes from two Aztec Nahuatl words – ahuacatl (avocado) and molli (sauce).
The Best Guacamole
2 ripe avocados
1/2 cup red onion, chopped finely
1 jalapeno, stem and seeds removed, minced finely
1/4 cup fresh cilantro (leaves and tender stems), finely chopped
1 tablespoon of fresh lime juice
1/2 teaspoon sea salt
Freshly grated black pepper
1/2 ripe tomato, seeds and pulp removed, chopped
Cut avocados in half and remove the seed, then slice into narrow wedges. Peel the skin from the flesh and put in a bowl. Mash the avocado, leaving come larger chunks.
Add the chopped onion, cilantro, lime juice, salt and pepper and mash some more. Add a bit of the jalapeno to the guacamole and taste. Keep adding until it reaches the desired heat. I don't add much, but some people like it hot. If you're making ahead, cover the guacamole with plastic wrap, pressing the wrap against the dip and refrigerate. However, I don't like it as much once it's been refrigerated, so I think it's best to make it right before serving. Whichever way you do it, mix in the chopped tomatoes just before serving.
Thursday, July 25, 2013
Day 210 -- My Little Herb Garden -- Mint
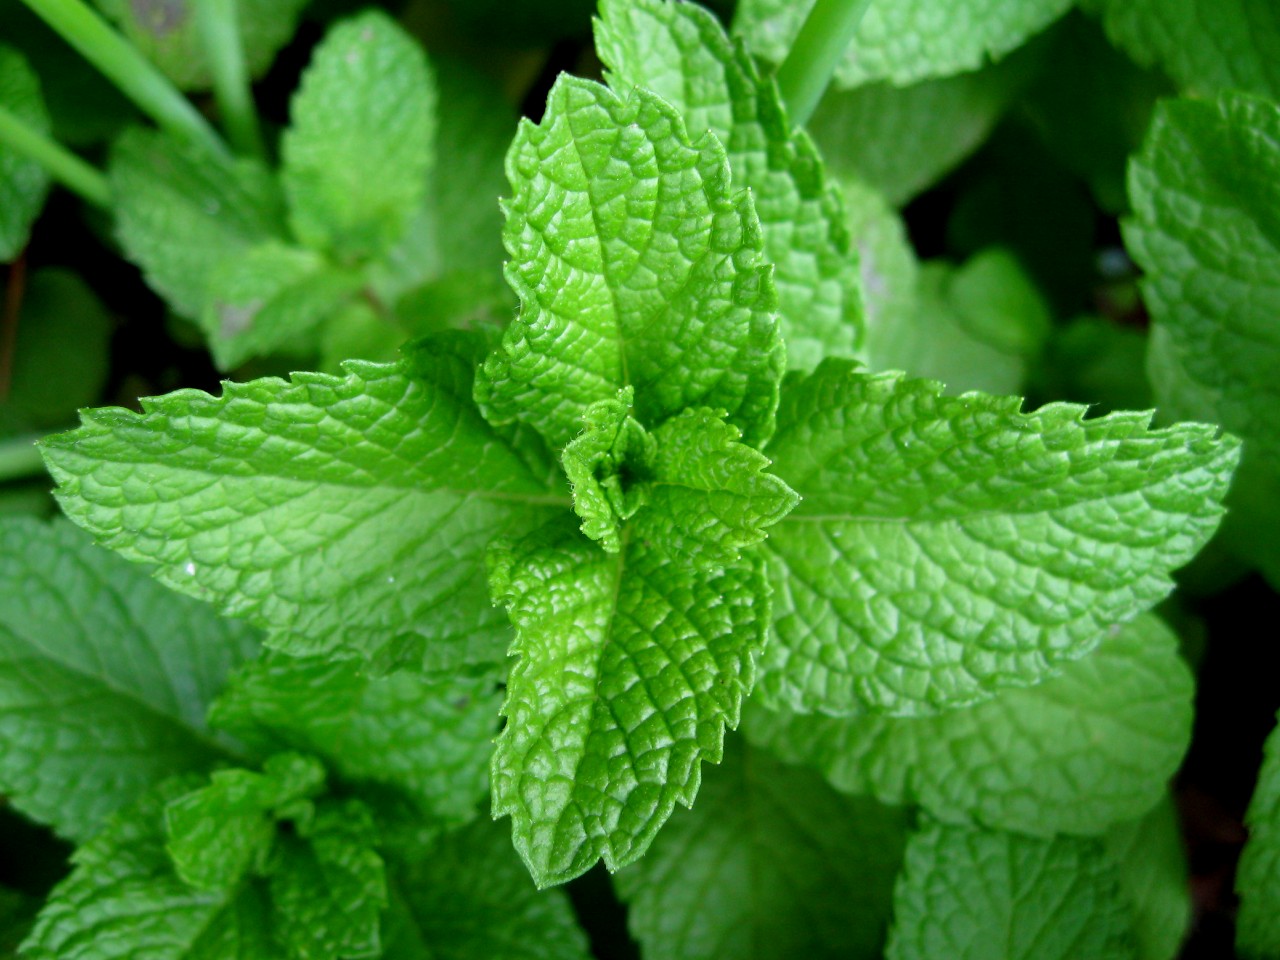
I've decided to do a little series of posts on the herbs in my little herb garden. So today, I'm doing mint. I have two types of mint in my garden -- spearmint and peppermint. It's the perfect thing to have around in the summer to add a little bit of flavor to iced tea. But the best use of fresh mint is in the very popular vegan drink -- the mojito!
Making a mojito is pretty simple. It takes sugar, mint, rum, and club soda. I'm using organic sugar although I'm sure if it makes a difference because I'm not using organic rum! Is there organic rum? It turns out there is! Here's an article about organic booze from the Treehugger blogspot.
So, on to the recipe for mojitos.
Mojitos -- Makes 2
Ice
2 ounces light rum
4 mint sprigs, or spearmint, 8 roughly broken apart
2 tablespoons fresh lime juice
4 t. sugar
Club soda
2 slices lime
Divide the sugar and the mint between two 12 oz. glasses. Using the back of a spoon, muddle the sugar and the mint, crushing the leaves with the sugar to release the mint flavor. Fill the glass with ice then add the rum and the lime juice and fill to the top with club soda. Add a sprig of mint and a slice of lime and enjoy! Best if sipped through a straw.
Making a mojito is pretty simple. It takes sugar, mint, rum, and club soda. I'm using organic sugar although I'm sure if it makes a difference because I'm not using organic rum! Is there organic rum? It turns out there is! Here's an article about organic booze from the Treehugger blogspot.
So, on to the recipe for mojitos.
Mojitos -- Makes 2
Ice
2 ounces light rum
4 mint sprigs, or spearmint, 8 roughly broken apart
2 tablespoons fresh lime juice
4 t. sugar
Club soda
2 slices lime
Divide the sugar and the mint between two 12 oz. glasses. Using the back of a spoon, muddle the sugar and the mint, crushing the leaves with the sugar to release the mint flavor. Fill the glass with ice then add the rum and the lime juice and fill to the top with club soda. Add a sprig of mint and a slice of lime and enjoy! Best if sipped through a straw.
Monday, July 22, 2013
Day 207 -- Time To Make The Kimchi - Revised
It was time to make another batch of my favorite kimchi -- a vegetarian kimchi based on the delicious Sunjay brand. I've done some tweaking of the recipe and this batch turned out particularly good. Just the right amount of salt and red pepper flakes. I let it ferment for 3 days before putting it in the fridge. And it was made with a green cabbage freshly cut from my father's garden!
The kimchi always seems to get better with a little age. It lasts in the fridge for at least a couple months and usually takes at least a couple weeks for the flavors to meld. So, here's my latest recipe!
Kimchi Recipe
The kimchi always seems to get better with a little age. It lasts in the fridge for at least a couple months and usually takes at least a couple weeks for the flavors to meld. So, here's my latest recipe!
Kimchi Recipe
1 very large head of green cabbage, chopped
2 bunches green onions, sliced
Put in enamel pot or glass bowl with 6 T. kosher or sea salt and stir. Leave for 12 hours until cabbage begins to wilt. Green cabbage will remain more crispy than Napa or Chinese cabbage and will release very little liquid. Add 8 cups water, 2 chopped leeks (thoroughly washed) and 1 package matchstick carrots to the pot.
Blend together the following and stir into the cabbage mixture
1 6" knob ginger peeled
12 cloves garlic
2 T miso
2 T. sugar
1 to 1 1/2 cup Korean red pepper flakes
Place a plate over the cabbage mixture and something heavy to weight it down so that all the cabbage is covered in liquid. Cover the pot or the container and set aside to ferment. It should be ready in about 3 days. Put in containers and refrigerate.
1 to 1 1/2 cup Korean red pepper flakes
Place a plate over the cabbage mixture and something heavy to weight it down so that all the cabbage is covered in liquid. Cover the pot or the container and set aside to ferment. It should be ready in about 3 days. Put in containers and refrigerate.
Sunday, July 21, 2013
Day 206 -- Too Many Beets!
I love sammiches! Especially when I find an interesting new vegan combination. This recipe, for a Chickpea, Beet and Apple Panini, is from Vegetarian Times that uses raw beets! I've never eaten raw beets but I'm going to give this sandwich a try!
Chickpea, Beet, and Apple Panini
1 ½ cups cooked chickpeas, or 1 15-oz. can chickpeas, rinsed and drained
3 Tbs. vegan mayonnaise
1 Tbs. lemon juice
1 tsp. chopped fresh tarragon
8 slices sesame semolina bread (8 oz.)
1 medium golden beet, peeled and sliced (yes, raw, not cooked)
1 Granny smith apple, thinly sliced
¼ cup broccoli or radish sprouts
4 Tbs. prepared black olive tapenade
1. Pulse chickpeas, mayonnaise, lemon juice, and tarragon in food processor until chunky.
2. Spread chickpea mixture on 4 bread slices. Top with beet and apple slices, and sprouts. Spread remaining 4 bread slices with tapenade; close sandwiches.
3. Spray panini with cooking spray. Coat skillet or grill pan with cooking spray; heat over medium heat. Place panini in pan; weight with smaller-diameter saucepan weighted with 2 cans. Cook 3 minutes. Flip, replace weight, and cook 2 minutes. (Or cook 4 minutes in panini maker.)
Saturday, July 20, 2013
Day 205 -- In A Pickle With Beets
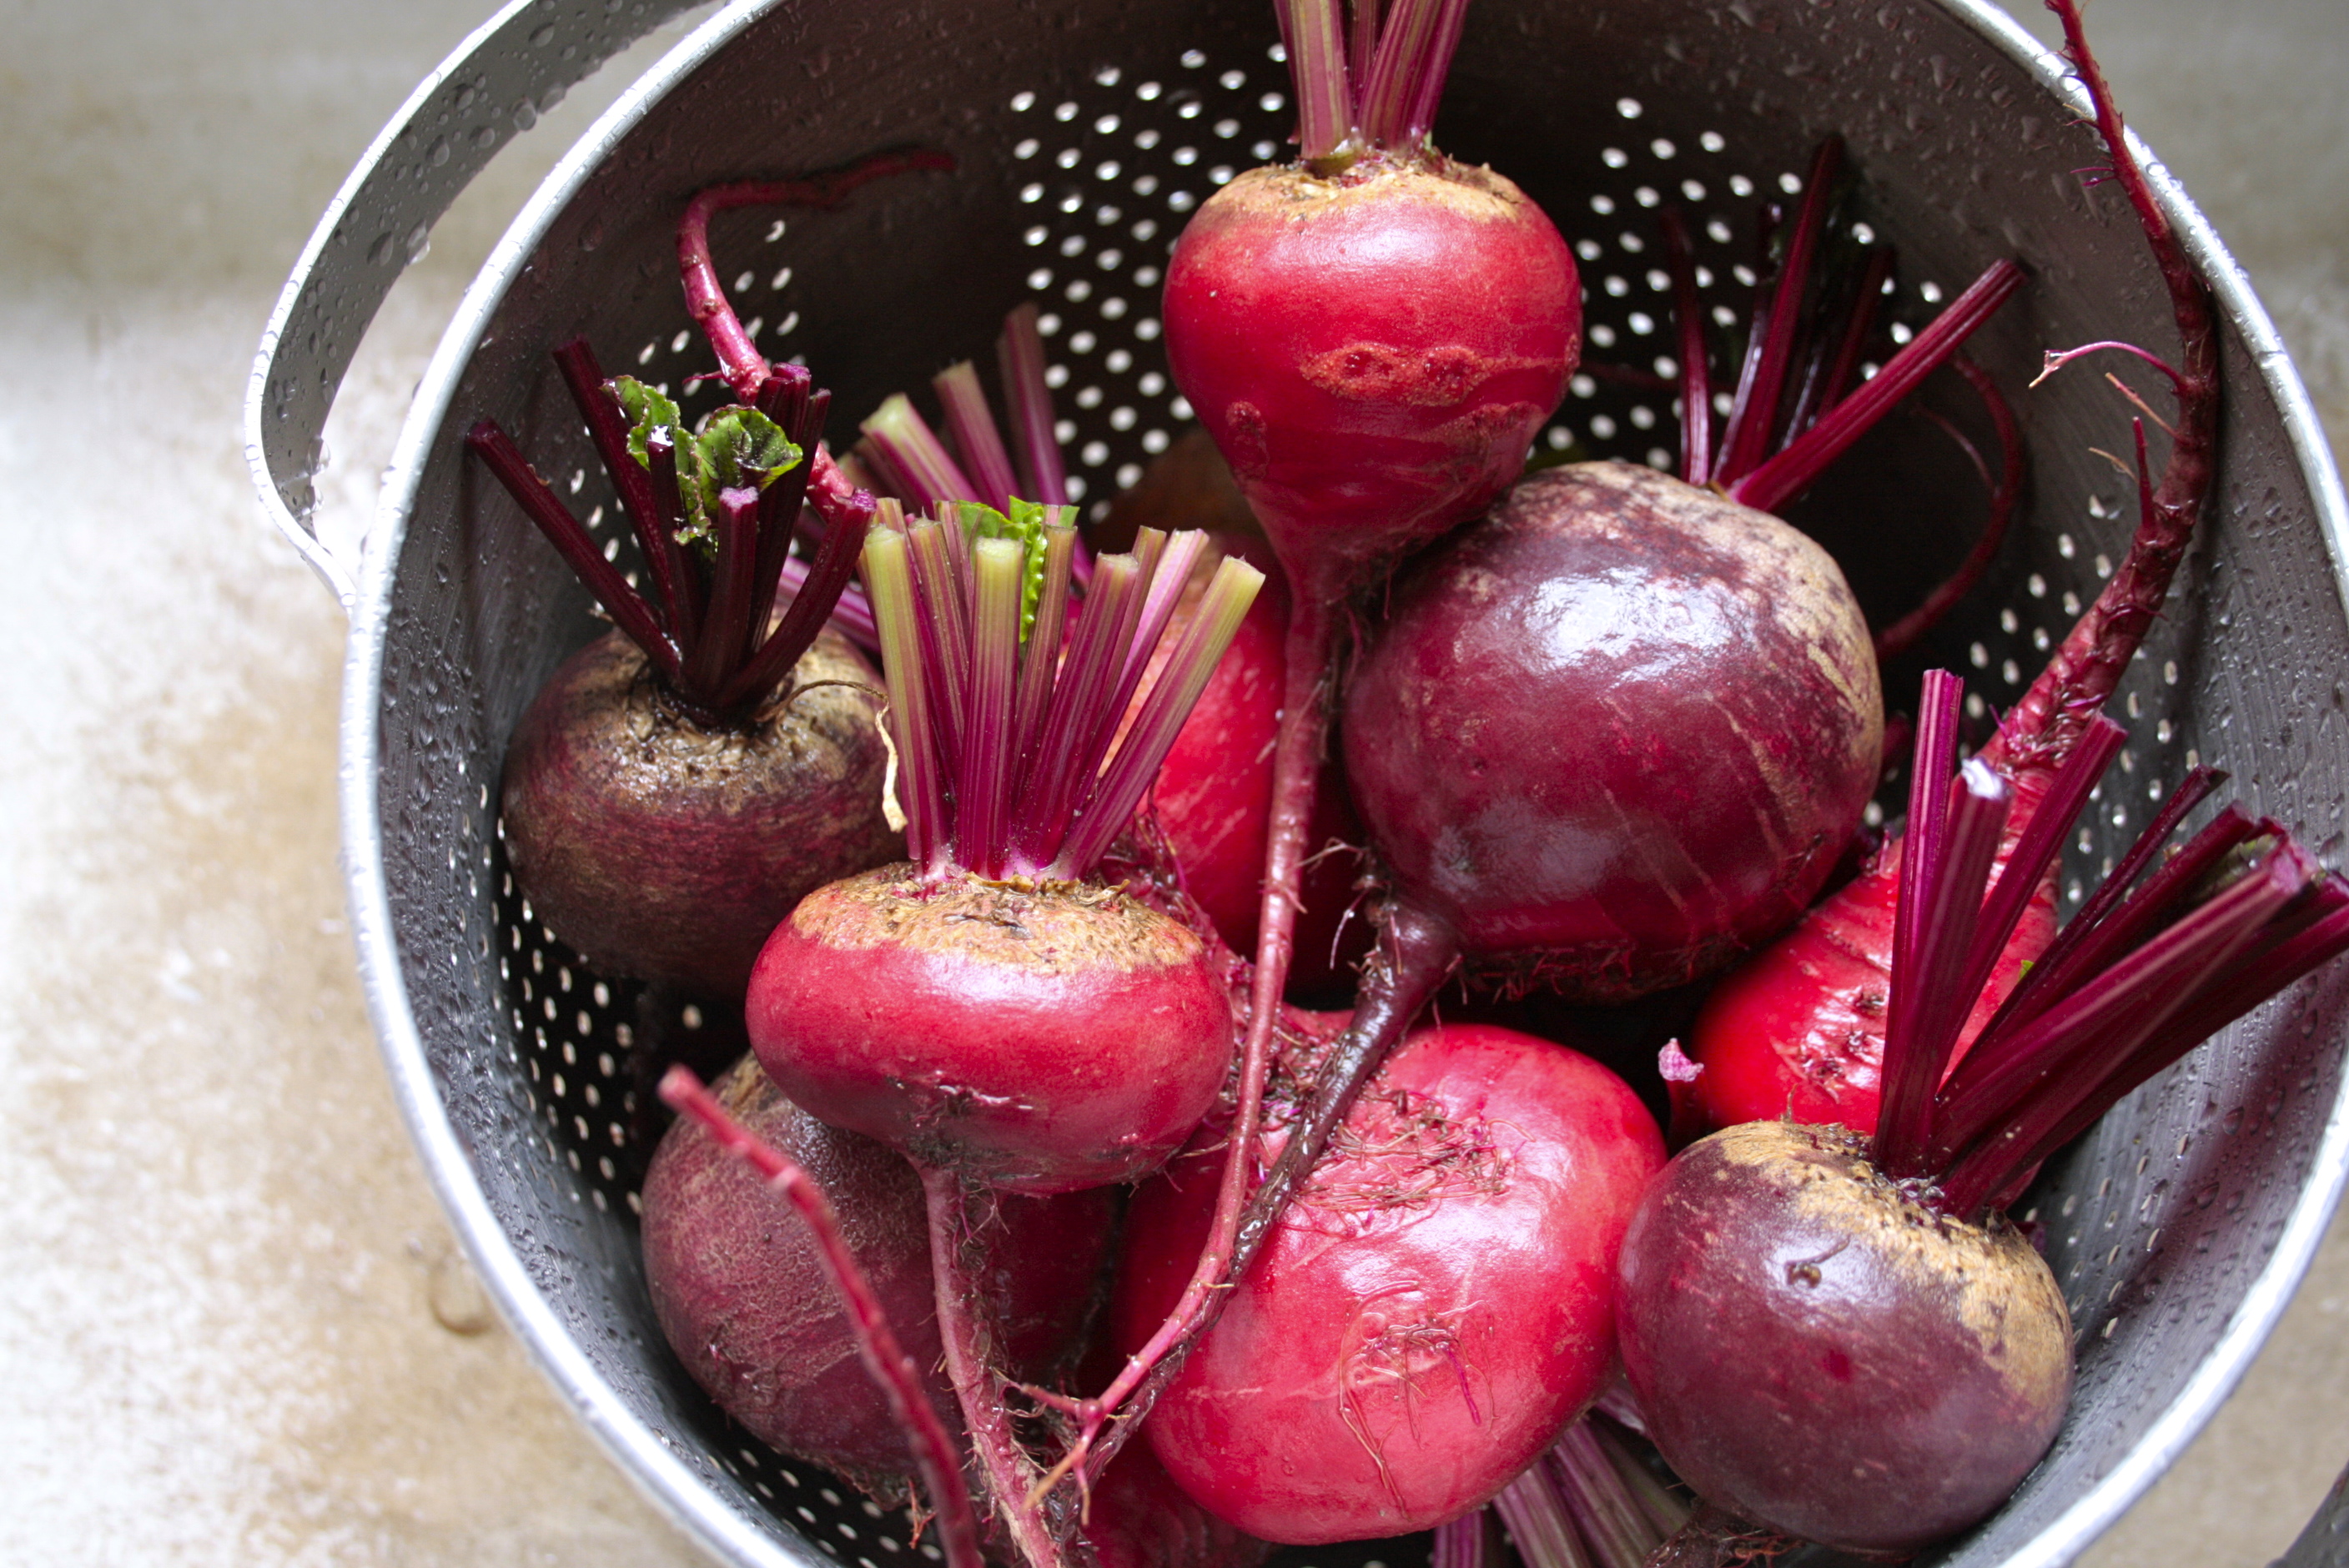
What do you do when you have too many beets? You make pickled beets. And I've made traditionally canned pickled beets in the past, but I've learned that it's easier to make refrigerator pickled beets. So here's a recipe!
The recipe required cooked beets and they can be boiled or roasted. In my opinion, it's easier to roast beets. Less mess, no overboil on the stove. So, I clean and trim the beets and then cut them in half (unpeeled) and roast them in a 400-degree oven until they soft when pricked with a fork.
Slice them up and put them in this recipe!
Refrigerator Pickled Beets
3 pounds fresh small whole beets (use similar size beets)*
2 sliced onions
2 cups apple cider vinegar
2 cups water
2 cups granulated sugar
3 or 4 garlic cloves, sliced in half
In a large saucepan over medium-high heat, add apple cider vinegar, water, sugar, and garlic cloves; bring to a boil, stirring until sugar melts. Reduce heat and let the pickling brine simmer approximately 5 minutes. Remove from heat and let brine cool before adding the cooked beets. I put the beets in a plastic ice cream bucket but you can pickle them jars even in a plastic ziplock bag.
The recipe required cooked beets and they can be boiled or roasted. In my opinion, it's easier to roast beets. Less mess, no overboil on the stove. So, I clean and trim the beets and then cut them in half (unpeeled) and roast them in a 400-degree oven until they soft when pricked with a fork.
Slice them up and put them in this recipe!
Refrigerator Pickled Beets
3 pounds fresh small whole beets (use similar size beets)*
2 sliced onions
2 cups apple cider vinegar
2 cups water
2 cups granulated sugar
3 or 4 garlic cloves, sliced in half
In a large saucepan over medium-high heat, add apple cider vinegar, water, sugar, and garlic cloves; bring to a boil, stirring until sugar melts. Reduce heat and let the pickling brine simmer approximately 5 minutes. Remove from heat and let brine cool before adding the cooked beets. I put the beets in a plastic ice cream bucket but you can pickle them jars even in a plastic ziplock bag.
Friday, July 19, 2013
Day 204 -- Dilly-Dallying With Veggies - Beans
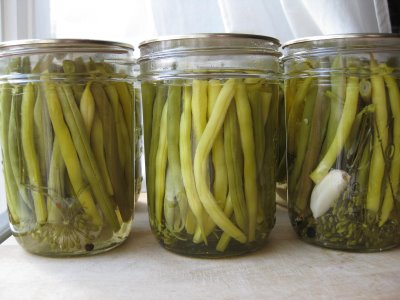
I spent the morning with my friend and neighbor, T, and we paid a visit to my father's garden and with my father's help, came away with green beans, peas, beets, kale, onions, gooseberries, cabbage, and swiss chard. We then stopped at a local orchard to check out their cherry harvest and as we were chatting, I was telling Toni that she could pickle some of the beans we picked. And right there, at the little orchard shop, was a jar of Dilly Beans.
In that past, I've done traditional canning, but I've found that for my purposes, refrigerator pickling is so much easier. So I've hunted down a recipe for Refrigerator Dilly Beans.
Refrigerator Dilly Beans
2 cups of green beans
1 cup vinegar
1 cup water
2 ½ tablespoons of sugar
2 cloves of garlic minced
1 ½ teaspoons of kosher salt
½ of a medium onion, sliced thinly
2 sprigs of fresh dill
½ teaspoon of whole black peppercorns
¼ to 1 teaspoon of red pepper flakes (depending on how hot you want them) – you can also add a whole dried chili if you have one.
It's best to do the beans in a glass container, a large canning jar is best. Make the brine. Add the water, vinegar, salt, sugar, and garlic to a saucepan and bring it to a boil. Once it is boiling, turn it off and set it aside to cool down to room temperature.
Blanch the trimmed beans. Do enough to pack into your jar with enough space at the top so that the brine can cover them completely. Bring a saucepan of water to a full boil, then dump the beans in and boil them for thirty seconds. Drain them, and quickly add them to a bowl of iced water to shock them and stop the cooking process. The beans should be brightly colored and still crisp.
Drain the beans and set them aside. Add your onions, dill, red pepper flakes, and peppercorns to your jars. They look prettiest standing upright, but don’t worry about being perfect. The easiest way is to lay the jar on its side, or hold it horizontally, and place the beans inside.
Pour your brine in once it has reached room temperature. Fill the jar to 1/2 inch below the top of the jar, and put the lid on. Place the jar of dilly beans in the fridge, and let them sit for at least two days before eating them. They’ll keep for up to six months in the fridge .
Tomorrow, we'll try Refrigerator Pickled Beets.
In that past, I've done traditional canning, but I've found that for my purposes, refrigerator pickling is so much easier. So I've hunted down a recipe for Refrigerator Dilly Beans.
Refrigerator Dilly Beans
2 cups of green beans
1 cup vinegar
1 cup water
2 ½ tablespoons of sugar
2 cloves of garlic minced
1 ½ teaspoons of kosher salt
½ of a medium onion, sliced thinly
2 sprigs of fresh dill
½ teaspoon of whole black peppercorns
¼ to 1 teaspoon of red pepper flakes (depending on how hot you want them) – you can also add a whole dried chili if you have one.
It's best to do the beans in a glass container, a large canning jar is best. Make the brine. Add the water, vinegar, salt, sugar, and garlic to a saucepan and bring it to a boil. Once it is boiling, turn it off and set it aside to cool down to room temperature.
Blanch the trimmed beans. Do enough to pack into your jar with enough space at the top so that the brine can cover them completely. Bring a saucepan of water to a full boil, then dump the beans in and boil them for thirty seconds. Drain them, and quickly add them to a bowl of iced water to shock them and stop the cooking process. The beans should be brightly colored and still crisp.
Drain the beans and set them aside. Add your onions, dill, red pepper flakes, and peppercorns to your jars. They look prettiest standing upright, but don’t worry about being perfect. The easiest way is to lay the jar on its side, or hold it horizontally, and place the beans inside.
Pour your brine in once it has reached room temperature. Fill the jar to 1/2 inch below the top of the jar, and put the lid on. Place the jar of dilly beans in the fridge, and let them sit for at least two days before eating them. They’ll keep for up to six months in the fridge .
Tomorrow, we'll try Refrigerator Pickled Beets.
Thursday, July 18, 2013
Day 203 -- Detox Drinks -- Do They Work?
I've seen so many different recipes for detox drinks that include some combination of lemon and/or cayenne pepper and/or vinegar and they never seemed to appeal to me. My friend, E, posted a link for this recipe for Skinny Body Fat Flush and Detox on Facebook today and I've decided I'm going to give it a try. It seems simple enough and I have a ton of mint growing in my little herb garden that I need to use! It could be quite refreshing and if it flushes fat I'm all for that! Just so you know, I don't hold out a lot of hope that this will help, but I'm willing to give it a try!
Skinny Body Fat Flush and Detox
1 cucumber
1 lemon
2 limes
1 bunch of mint
Slice them all and divide the ingredients between four 24 oz water bottles and fill them up with filtered water.
I'm going to put this in a large gallon pitcher instead of 4 water bottles and just pour myself a big old glass full every day. And I'll report back soon and let you know how it works.
Skinny Body Fat Flush and Detox
1 cucumber
1 lemon
2 limes
1 bunch of mint
Slice them all and divide the ingredients between four 24 oz water bottles and fill them up with filtered water.
I'm going to put this in a large gallon pitcher instead of 4 water bottles and just pour myself a big old glass full every day. And I'll report back soon and let you know how it works.
Friday, July 12, 2013
Day 197 -- That's How The Cherry Crumbles
Since I've started eating vegan, I haven't been much into desserts, with the exception of my favorite molasses cookies. Since my blood sugar remains pretty constant during the day, I don't find myself craving sweets and when I do, fruit seems to satisfy me quite nicely.
The other day, I bought a cherry pitter and with that purchase came the notion that I could now use fresh cherries in my cooking. I immediately thought about making a cobbler or a crumble, but since I was too lazy to look for a recipe, I decided to just wing it. I mixed a small bit of sugar and some whole wheat flour with my halved and pitted cherries and then put them in a small casserole. Then I mixed some melted Earth Balance margerine, some brown sugar and more flour for the crumble topping. I thought about adding some chopped almonds as almonds and cherries are always good together, but I decided to go simple.
And it was really good! It felt nice to enjoy a dessert again, especially one made with luscious and very fresh Bing cherries. I have a tart cherry tree in my backyard that is almost ready to be picked, so that's my chore in the next few days. With those cherries, I'm going to try a real recipe. I modified this one from a recipe I found online.
Cherry Crumble
Makes 6 servings
Approximately 4-5 cups of fresh, pitted cherries cut in half
1/4 c. Demerara sugar
1/2 cup plus 1 T. whole wheat flour
1/2 cup rolled oats
1/3 cup brown sugar
3/4 teaspoon ground cinnamon
3/4 teaspoon ground nutmeg
1/4 cup chopped pecans or almonds
1/3 cup melted Earth Balance margarine
Preheat oven to 350 degrees F (175 degrees C.) Lightly grease an 8-inch square baking dish. Mix cherries with 1T. flour and 1/4 cup Demerara sugar (less if you're using sweet cherries) In a medium bowl, mix together remainting flour, oats, sugar, cinnamon, and nutmeg. Mix in melted margarine. Spread over pie filling, and sprinkle with chopped pecans or almonds. Bake in the preheated oven for 30 minutes, or until topping is golden brown. Allow to cool 15 minutes before serving.
The other day, I bought a cherry pitter and with that purchase came the notion that I could now use fresh cherries in my cooking. I immediately thought about making a cobbler or a crumble, but since I was too lazy to look for a recipe, I decided to just wing it. I mixed a small bit of sugar and some whole wheat flour with my halved and pitted cherries and then put them in a small casserole. Then I mixed some melted Earth Balance margerine, some brown sugar and more flour for the crumble topping. I thought about adding some chopped almonds as almonds and cherries are always good together, but I decided to go simple.
And it was really good! It felt nice to enjoy a dessert again, especially one made with luscious and very fresh Bing cherries. I have a tart cherry tree in my backyard that is almost ready to be picked, so that's my chore in the next few days. With those cherries, I'm going to try a real recipe. I modified this one from a recipe I found online.
Cherry Crumble
Makes 6 servings
Approximately 4-5 cups of fresh, pitted cherries cut in half
1/4 c. Demerara sugar
1/2 cup plus 1 T. whole wheat flour
1/2 cup rolled oats
1/3 cup brown sugar
3/4 teaspoon ground cinnamon
3/4 teaspoon ground nutmeg
1/4 cup chopped pecans or almonds
1/3 cup melted Earth Balance margarine
Preheat oven to 350 degrees F (175 degrees C.) Lightly grease an 8-inch square baking dish. Mix cherries with 1T. flour and 1/4 cup Demerara sugar (less if you're using sweet cherries) In a medium bowl, mix together remainting flour, oats, sugar, cinnamon, and nutmeg. Mix in melted margarine. Spread over pie filling, and sprinkle with chopped pecans or almonds. Bake in the preheated oven for 30 minutes, or until topping is golden brown. Allow to cool 15 minutes before serving.
Subscribe to:
Posts (Atom)